In a Nutshell (🌰)
- Navigate to the Inventory screen and click "Install Agent on New Device"
- Enter SSH connection info (hostname/IP, port, authentication)
- Configure sudo settings if needed for elevated permissions
- Run connection tests to verify connectivity
- Select the agentless installation method (recommended)
- Confirm details and complete the device setup
Prerequisites
Before adding a device to SSM, ensure:
- You have SSH access to the target device
- The device meets the system requirements
- You have valid credentials (password or SSH key)
- If using key-based authentication, your private key is accessible
- For Docker management, Docker is installed on the target device
Step-by-Step Guide
1. Open the Inventory Panel
Navigate to the Inventory panel in the Configuration Section on the left sidebar and click "Install Agent on New Device".

2. Configure SSH Connection
In the modal that appears, enter the SSH connection information:
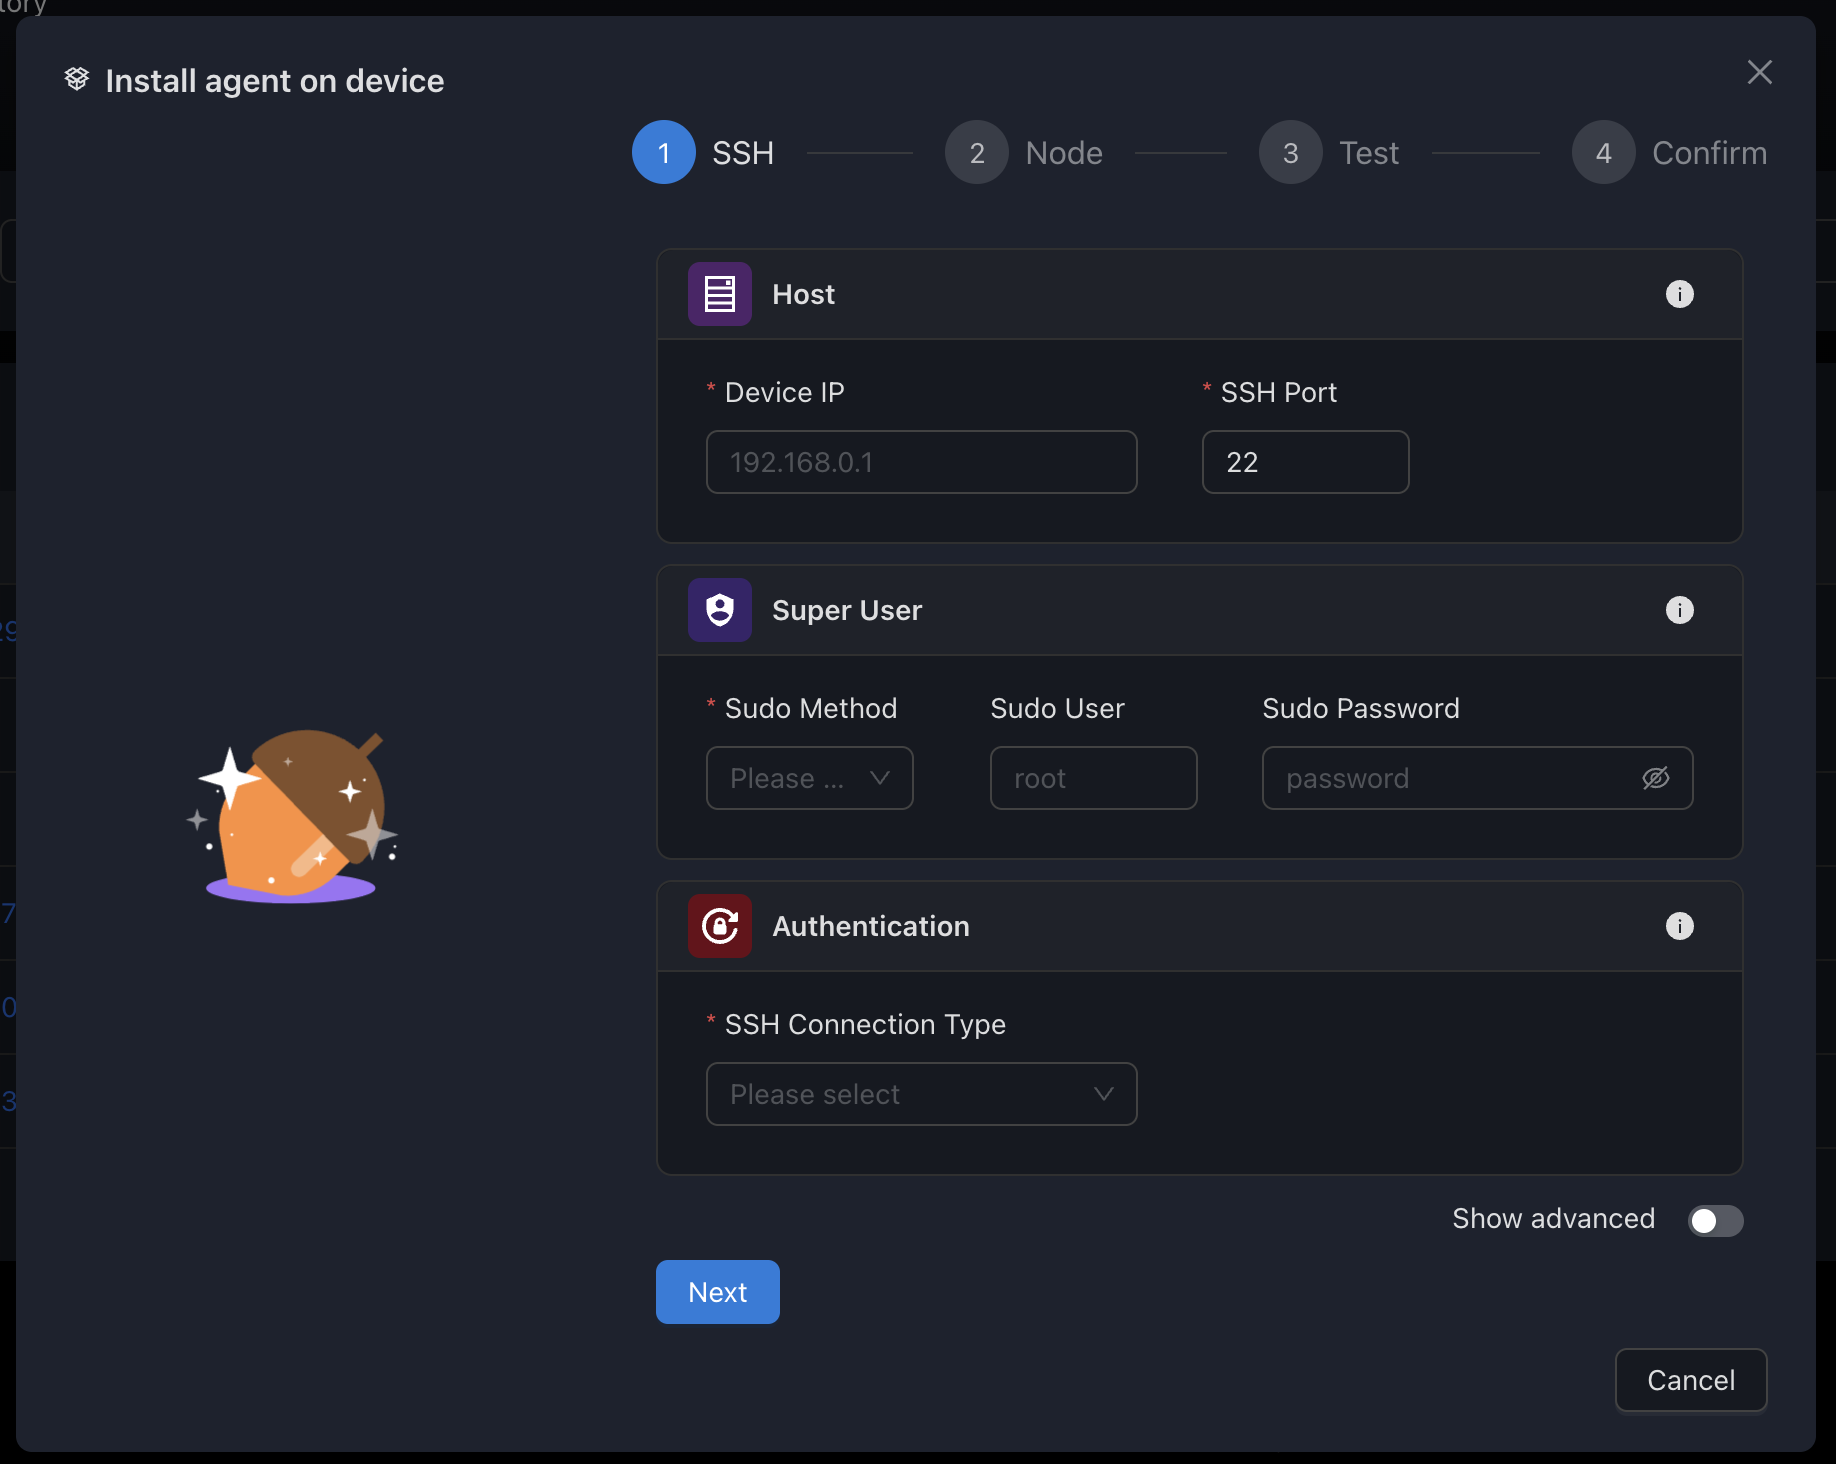
Fill in the following details:
- Hostname/IP: The IP address or hostname of your device
- SSH Port: Usually 22 (default) unless configured otherwise
- Authentication Method: Choose either password or key-based
- Username: SSH username with appropriate permissions
- Password/Key: Enter password or select your private key file
Sudo Configuration
If your user requires sudo for elevated permissions:
- Select the appropriate sudo method (with or without password)
- Provide sudo password if required
- Specify custom sudo user if needed
3. Run Connection Tests
SSM will automatically test the connection using your provided details.
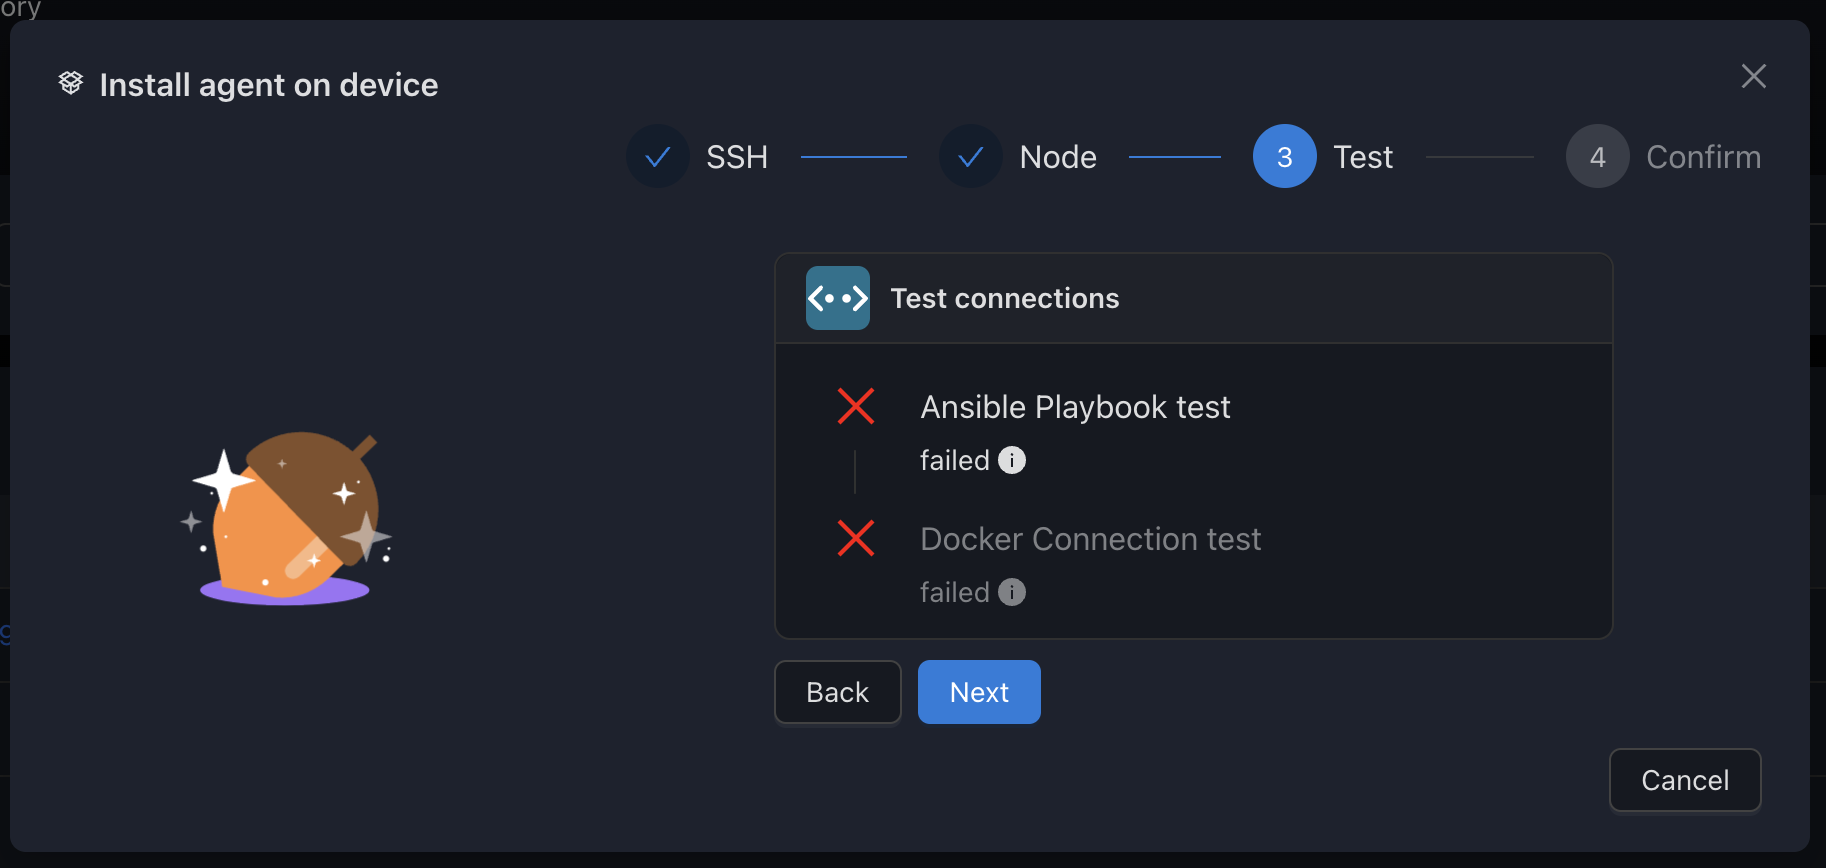
Wait for the tests to complete and address any issues that arise. Successful tests will show green checkmarks.
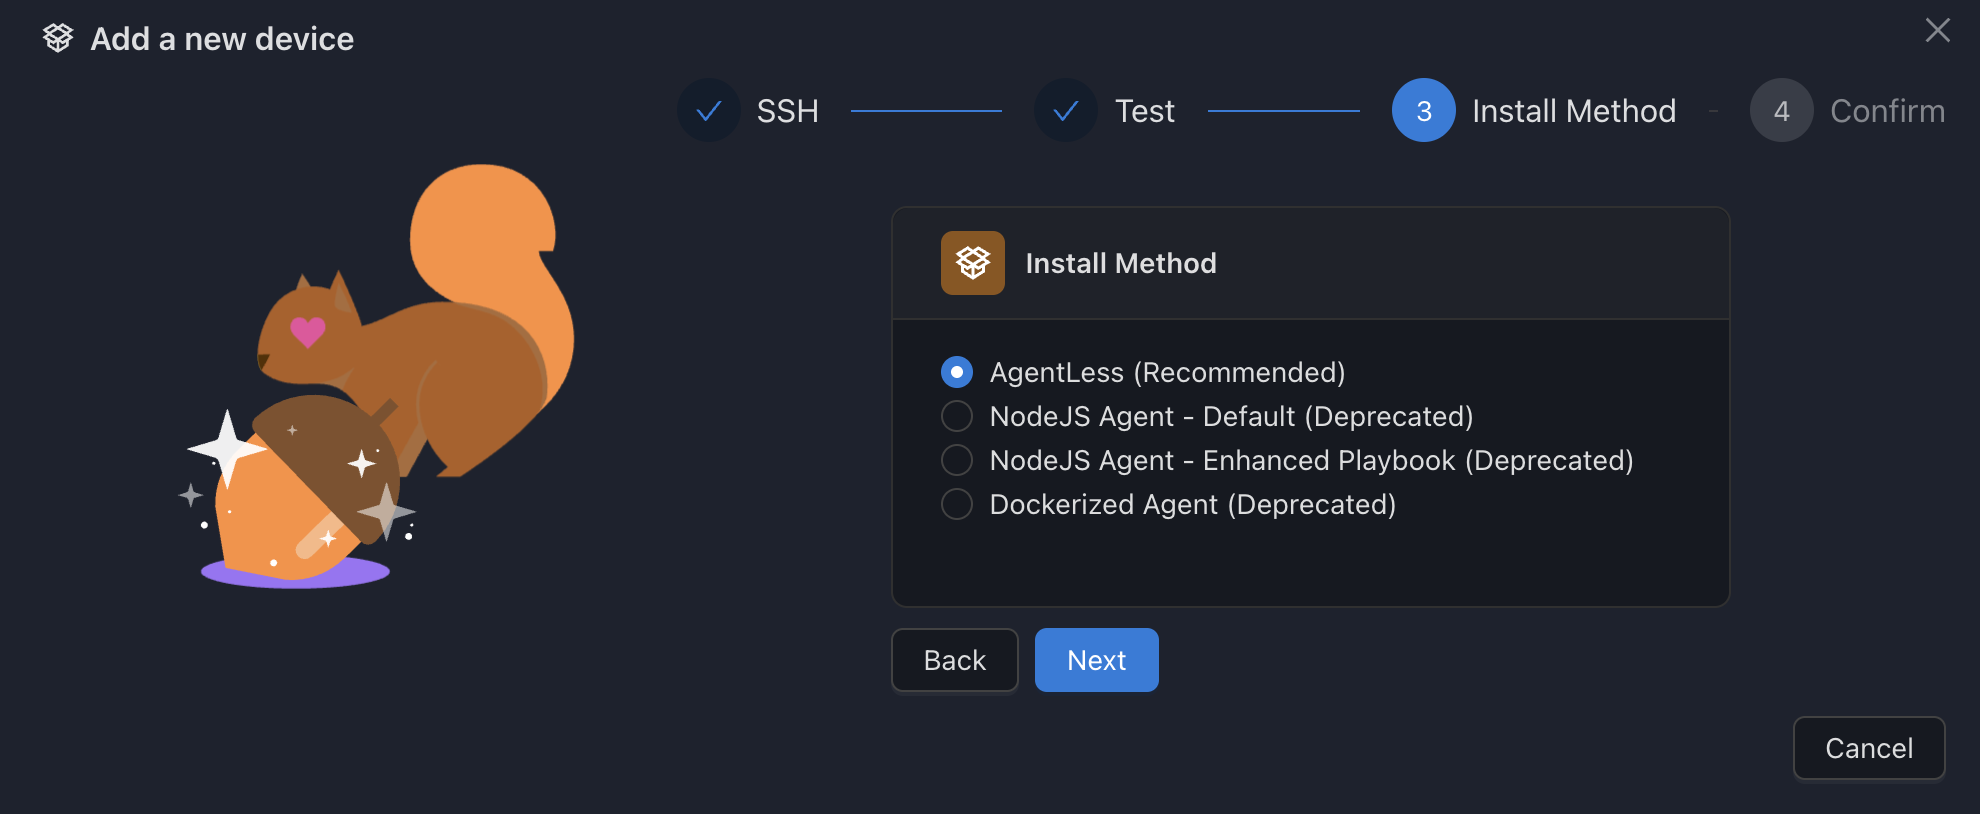
4. Choose Installation Method
Select the preferred installation method. We recommend using the default Agentless method.
| Method | Description | Recommended For |
|---|---|---|
| Agentless (Default) | Uses SSH for all operations without installing an agent | Most deployments; simplest setup |
| Node Agent (Deprecated) | Installs Node.js agent on the device | Legacy deployments only |
| Node Agent - Enhanced (Deprecated) | Installs Node.js agent with advanced playbook | Legacy deployments only |
| Dockerized Agent (Deprecated) | Runs agent in Docker container | Legacy deployments only |
5. Review and Confirm
Verify all information is correct on the confirmation screen.
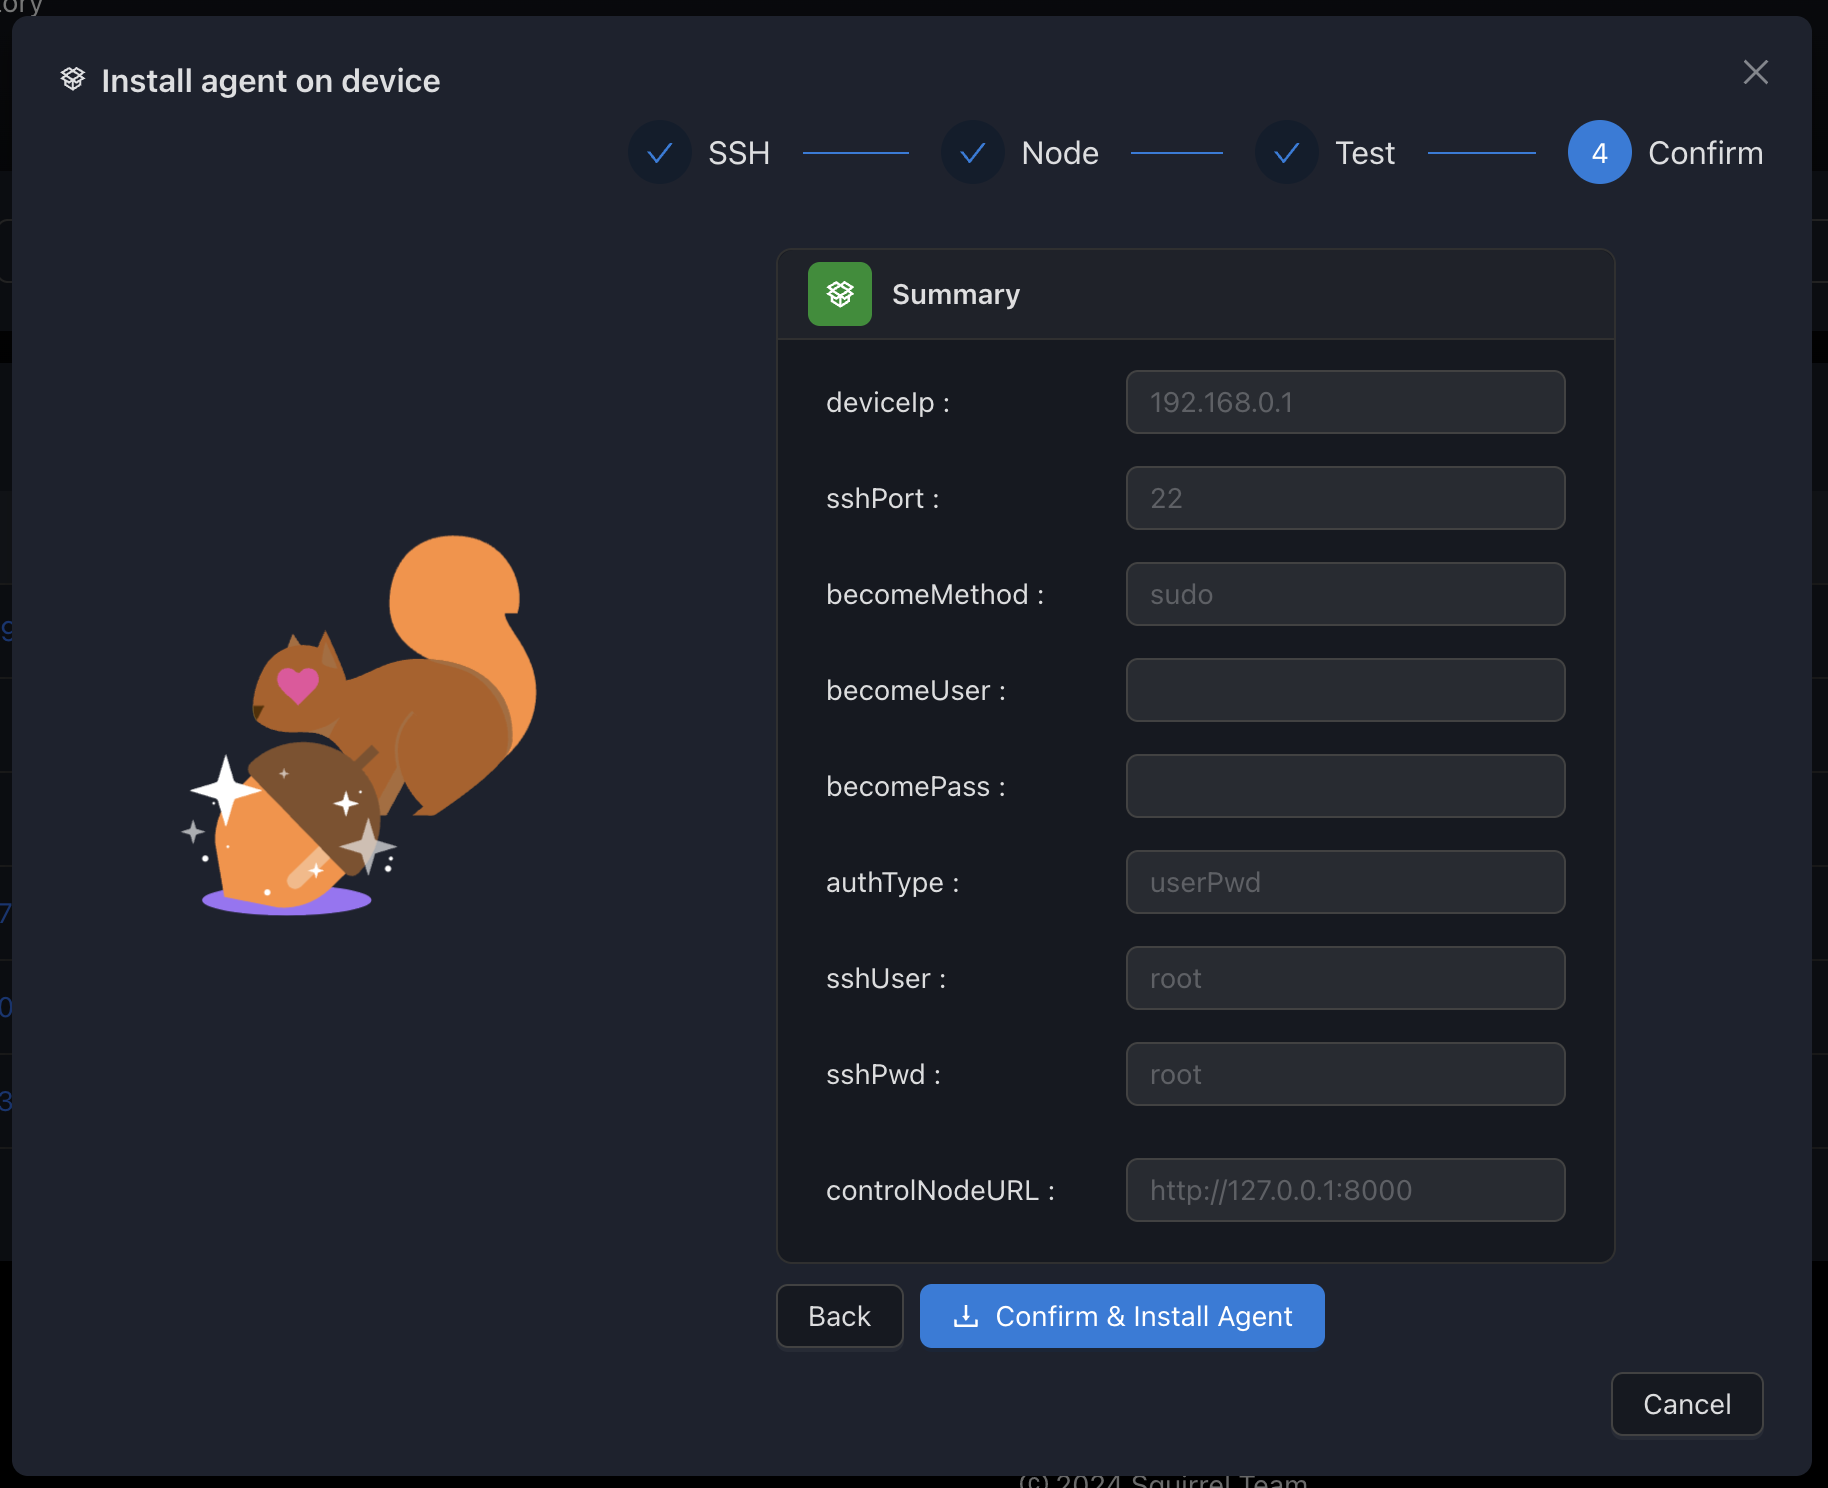
Click "Confirm" to add the device to SSM.
Advanced Configuration
After adding your device, you can configure additional features:
- SSH Advanced Configuration - Configure key management and connection options
- Docker Configuration - Set up container management capabilities
- Proxmox Configuration - Enable Proxmox integration if available
- Diagnostic Settings - Configure monitoring and diagnostics
Troubleshooting
If you encounter issues during device setup:
SSH Connection Failure
Problem: SSM can't establish SSH connection to your device.
Solutions:
- Verify IP address/hostname is correct
- Confirm SSH service is running on the device
- Check if firewall is blocking port 22 (or your custom SSH port)
- Ensure credentials are correct
Verification Command:
# Test SSH connection from your local machine
ssh username@device_ip -p port
Sudo Permission Issues
Problem: SSM can connect but fails when using sudo commands.
Solutions:
- Verify sudo password is correct
- Check that user has sudo privileges on the device
- Confirm sudo configuration doesn't require tty
- Try using a different sudo method in the configuration
Modify sudoers if needed:
# Add this line to /etc/sudoers to allow passwordless sudo for specific commands
username ALL=(ALL) NOPASSWD: /usr/bin/docker,/usr/bin/docker-compose
Docker Connection Failure
Problem: SSM connects via SSH but can't communicate with Docker.
Solutions:
- Verify Docker is installed on the device
- Ensure your user has permission to access Docker
- Check Docker socket permissions
- Configure Docker to listen on TCP if needed
Add user to Docker group:
sudo usermod -aG docker usernameDeleting a Device
When a device is no longer needed or managed by SSM, you can remove it from your inventory.
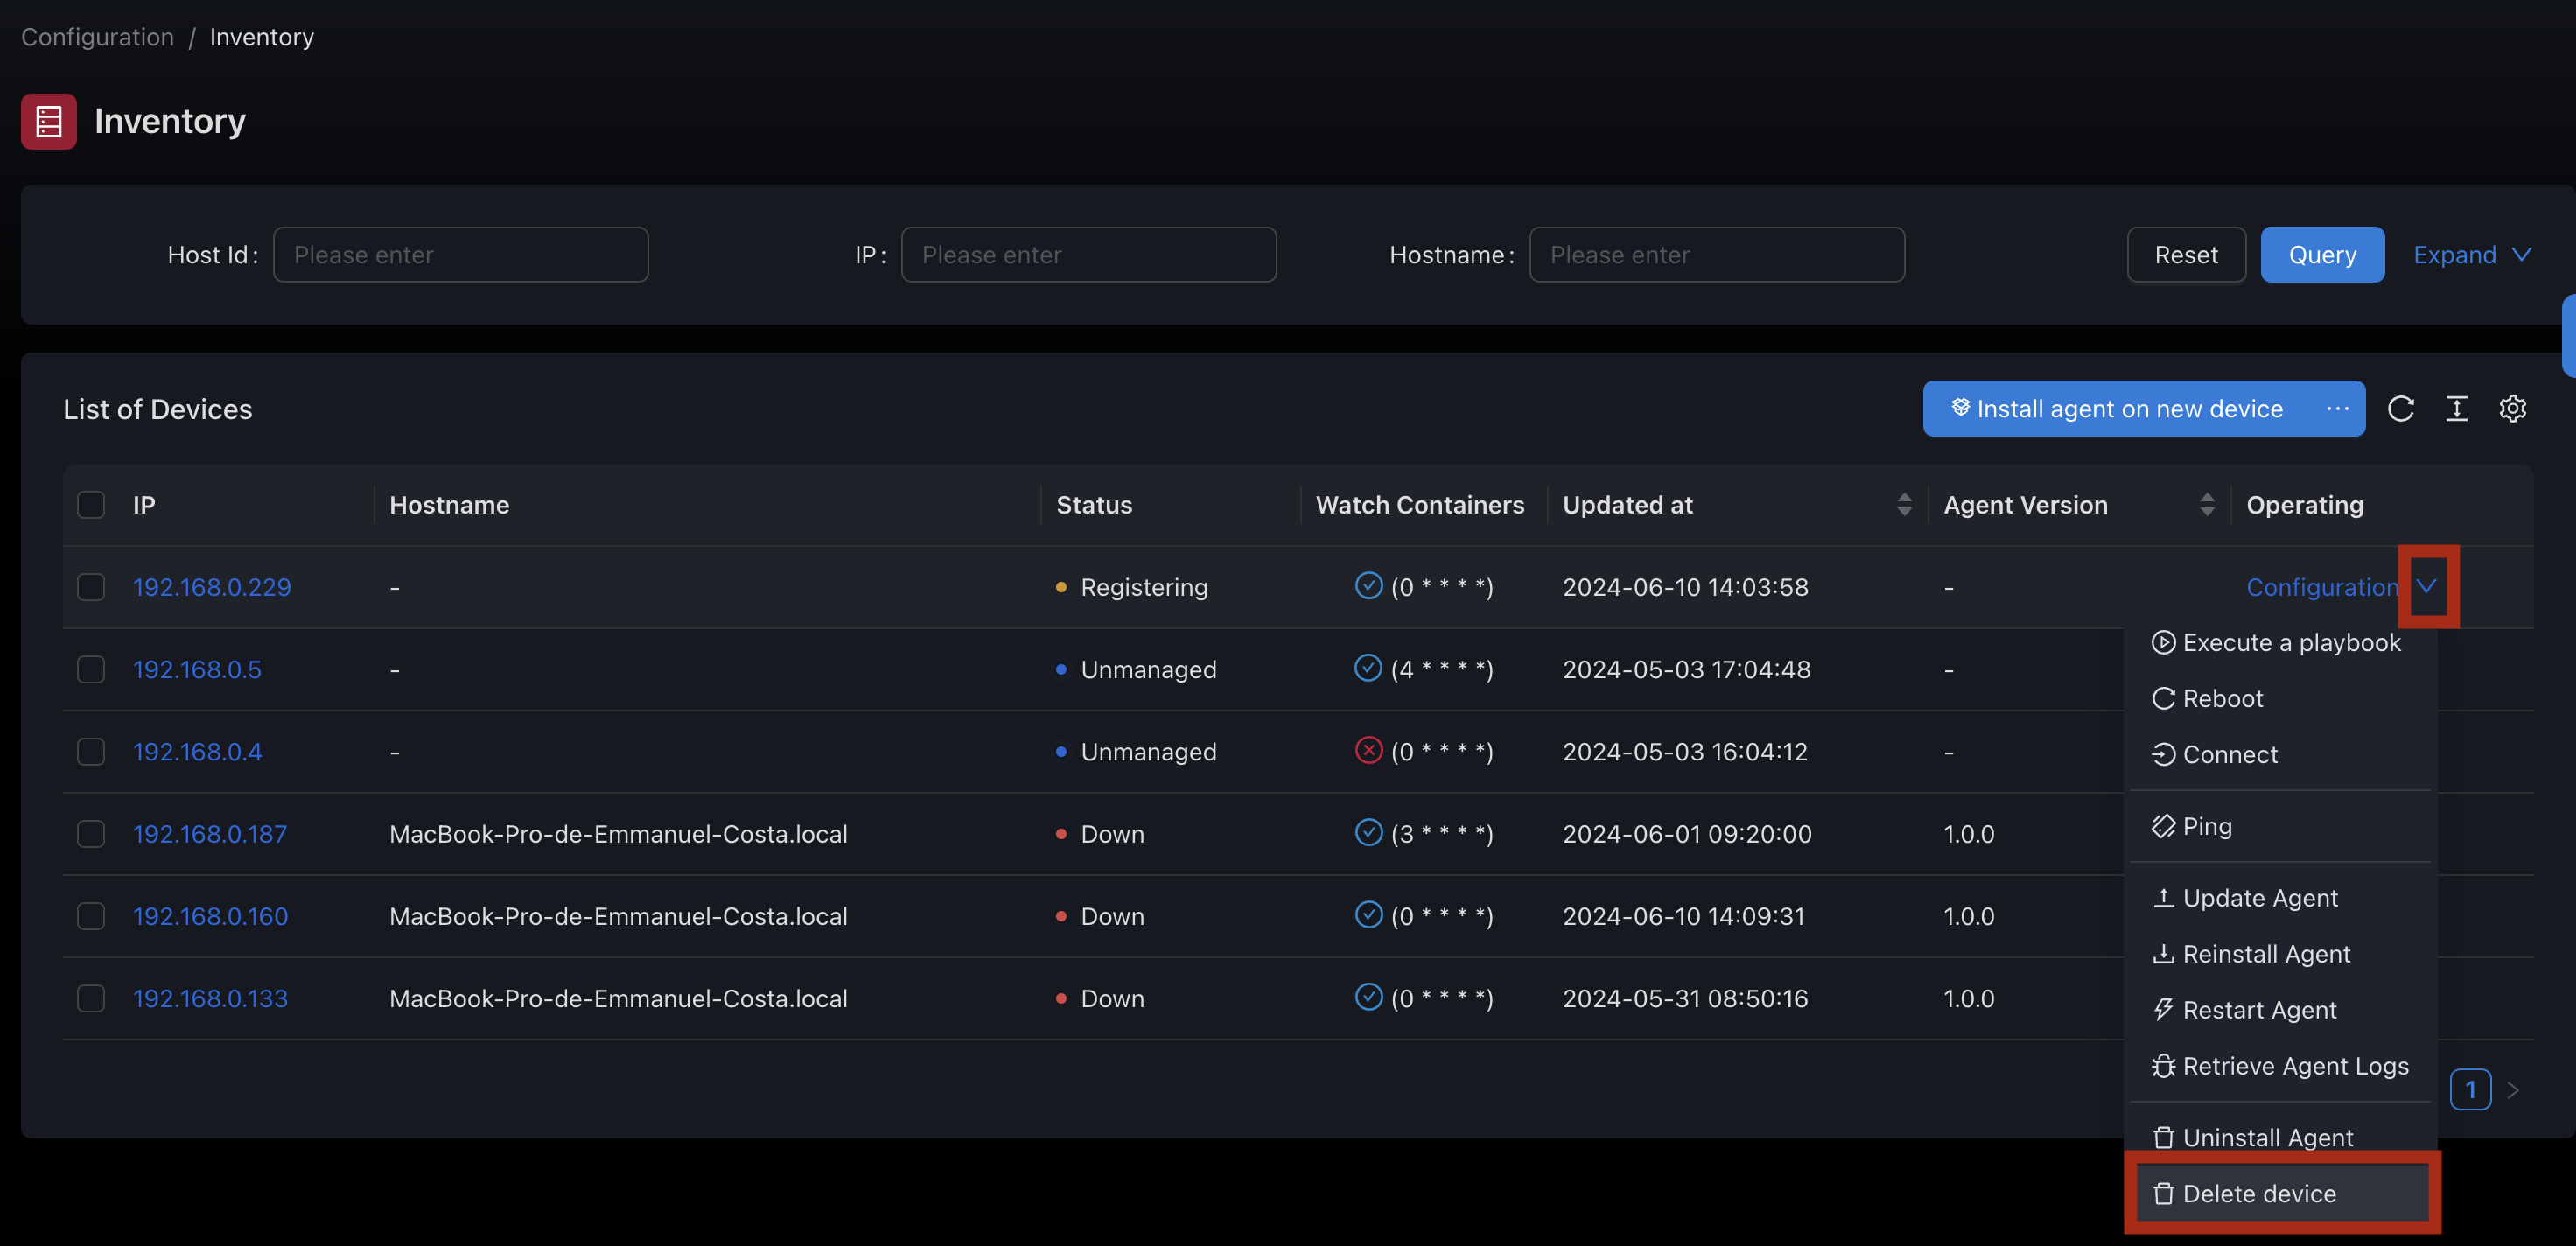
Steps to Delete a Device:
- Navigate to the Inventory panel (usually found under the Configuration section in the sidebar).
- Locate the device you wish to remove in the list.
- Click on the action menu (often represented by a drop-down arrow or a settings icon ⚙️) for that device.
- Select the "Delete device" option from the menu.
Important Considerations Before Deletion
- Irreversible Action: Deleting a device from SSM is an irreversible action. All statistics, monitoring data, and metadata associated with the device will be permanently removed from SSM.
- Agent Uninstall: Deleting a device from SSM does not automatically uninstall any agent software (e.g., Node Agent, Dockerized Agent if installed via a deprecated method) from the actual target server. You must manually remove these agents from the device itself if they are no longer needed.
Confirmation
After selecting "Delete device", a confirmation prompt will appear. This prompt will reiterate that the action is irreversible and that any installed agents should be manually uninstalled.
To proceed, confirm the deletion.
What Happens After Deletion?
- The device will be removed from your SSM inventory list.
- All historical data, metrics, and configuration specific to that device within SSM will be deleted.
- The actual server/device itself is not affected (e.g., it's not shut down, and no files are deleted from it by SSM through this action, other than potentially agent-related files if an uninstall playbook were run prior to deletion).
Uninstalling Agents (If Applicable)
If you were using an agent-based installation method (now deprecated), ensure you uninstall the agent from the device to free up resources and remove unnecessary software.
For guidance on removing installed agents, please refer to the Manual Agent Installation guide.