In a Nutshell (🌰)
- Create new automations through the Automations page
- Configure a unique name, trigger type, and action details
- Choose from playbook execution or Docker operations
- Monitor execution logs to verify automation success
Creating Your First Automation
Automations help you maintain your infrastructure by automatically performing routine tasks at scheduled intervals. This guide will walk you through creating your first automation in SSM.
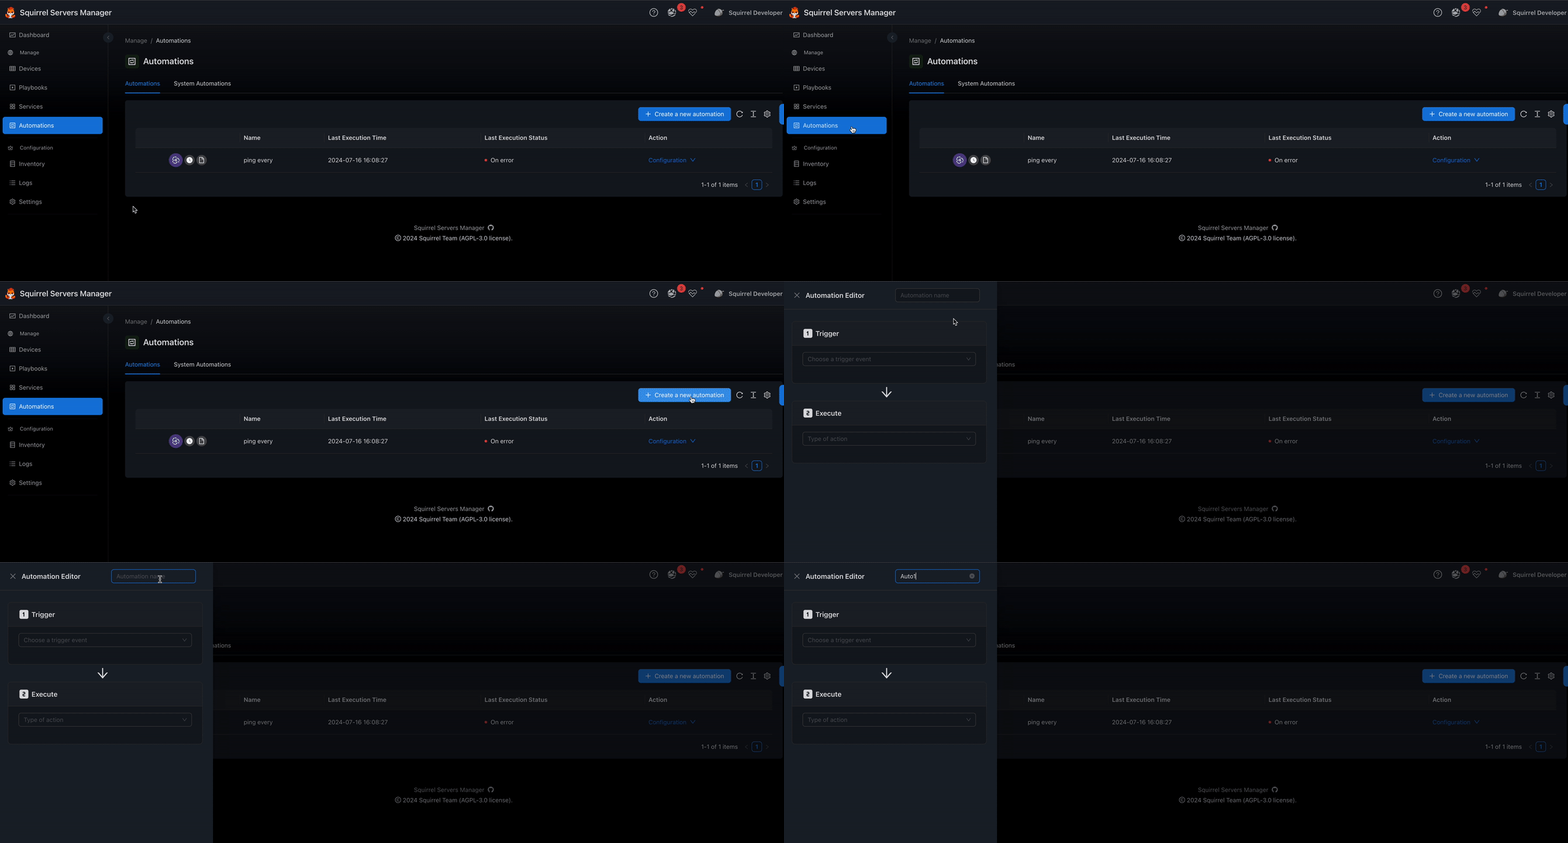
Step 1: Access the Automations Page
Navigate to the Automations section in the main menu. This page displays all your existing automations and provides options to create new ones.
Step 2: Open the Creation Form
Click the blue Add a new automation button to open the automation creation drawer.

Step 3: Name Your Automation
Enter a unique, descriptive name for your automation. Choose a name that clearly identifies what the automation does, such as:
- "Weekly Container Cleanup"
- "Database Backup"
- "Log Rotation"
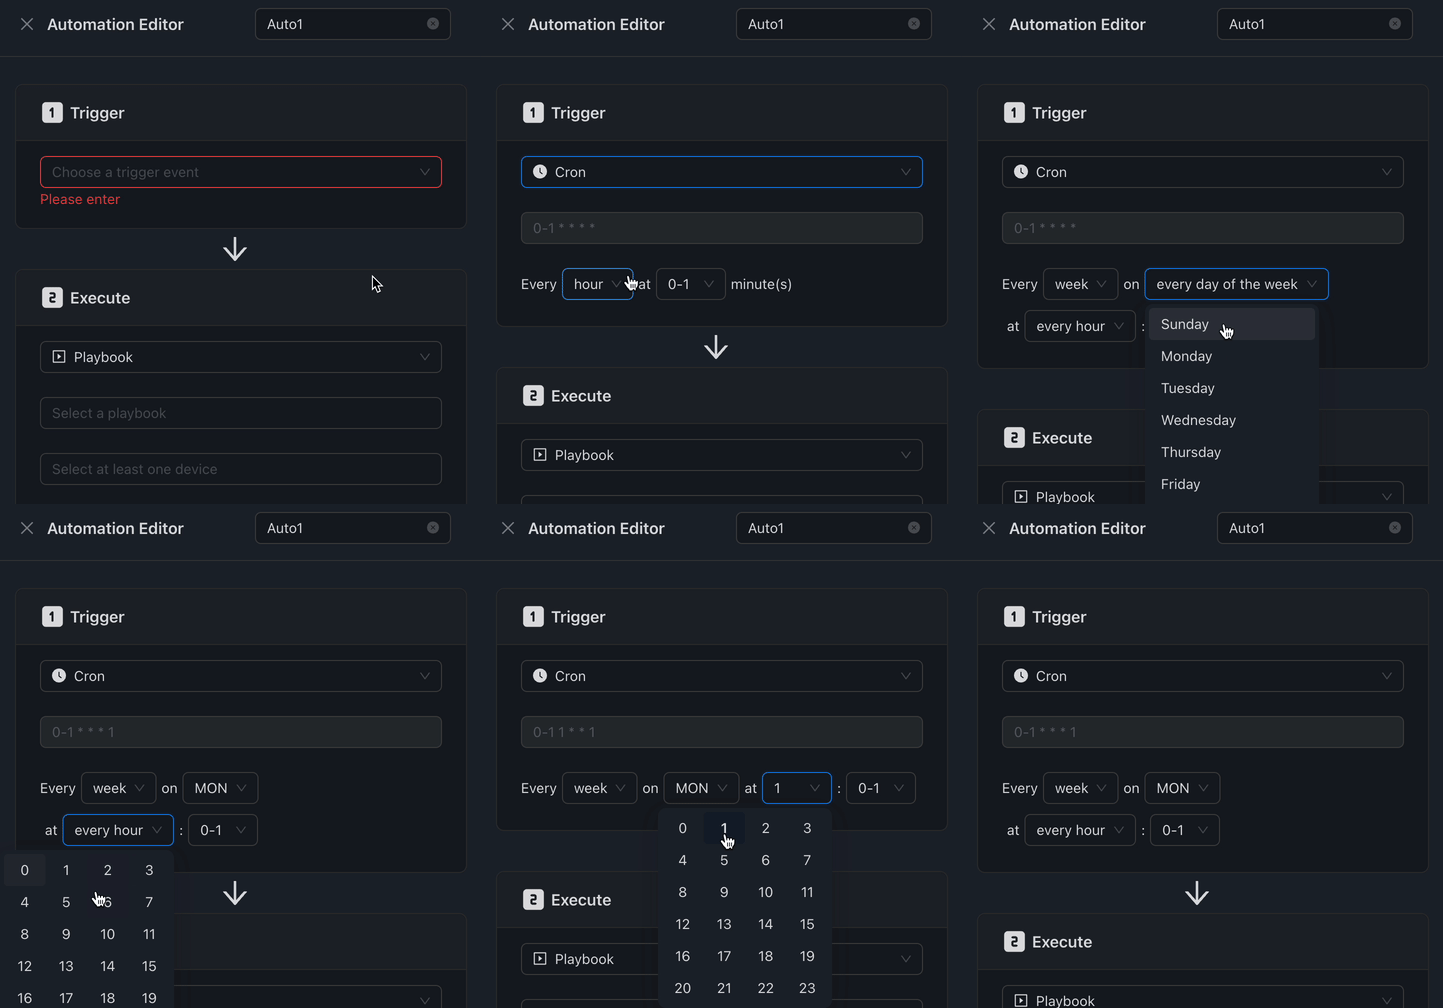
Step 4: Configure a Trigger
Select a trigger type to determine when your automation will run. Currently, SSM supports cron-based scheduling.

Cron Trigger Configuration
When selecting a Cron trigger, you can:
- Use the visual scheduler to select time intervals
- Enter a custom cron expression directly
- Use predefined templates (hourly, daily, weekly, monthly)
Cron Expression Examples
*/30 * * * *- Every 30 minutes0 4 * * *- Every day at 4:00 AM0 0 * * 0- Every Sunday at midnight0 0 1 * *- First day of every month at midnight
Step 5: Choose an Action
Select the action you want the automation to perform. SSM offers several action types:
Playbook Action
Execute an Ansible playbook:
- Select the Playbook action type
- Choose a playbook from the dropdown
- Select target devices for playbook execution
- Configure any required variables
Docker Action
Perform Docker container operations:
- Select the Docker Action type
- Choose the operation (start, stop, restart)
- Select the target device
- Choose the specific container
Docker Volume Action
Manage Docker volumes:
- Select the Docker Volume Action type
- Choose the operation (backup, prune)
- Select the target device
- Choose the specific volume (if applicable)
Step 6: Submit the Automation
Once you've configured all settings, click the Submit button to create your automation. The new automation will appear in your automations list and will begin running according to your configured schedule.
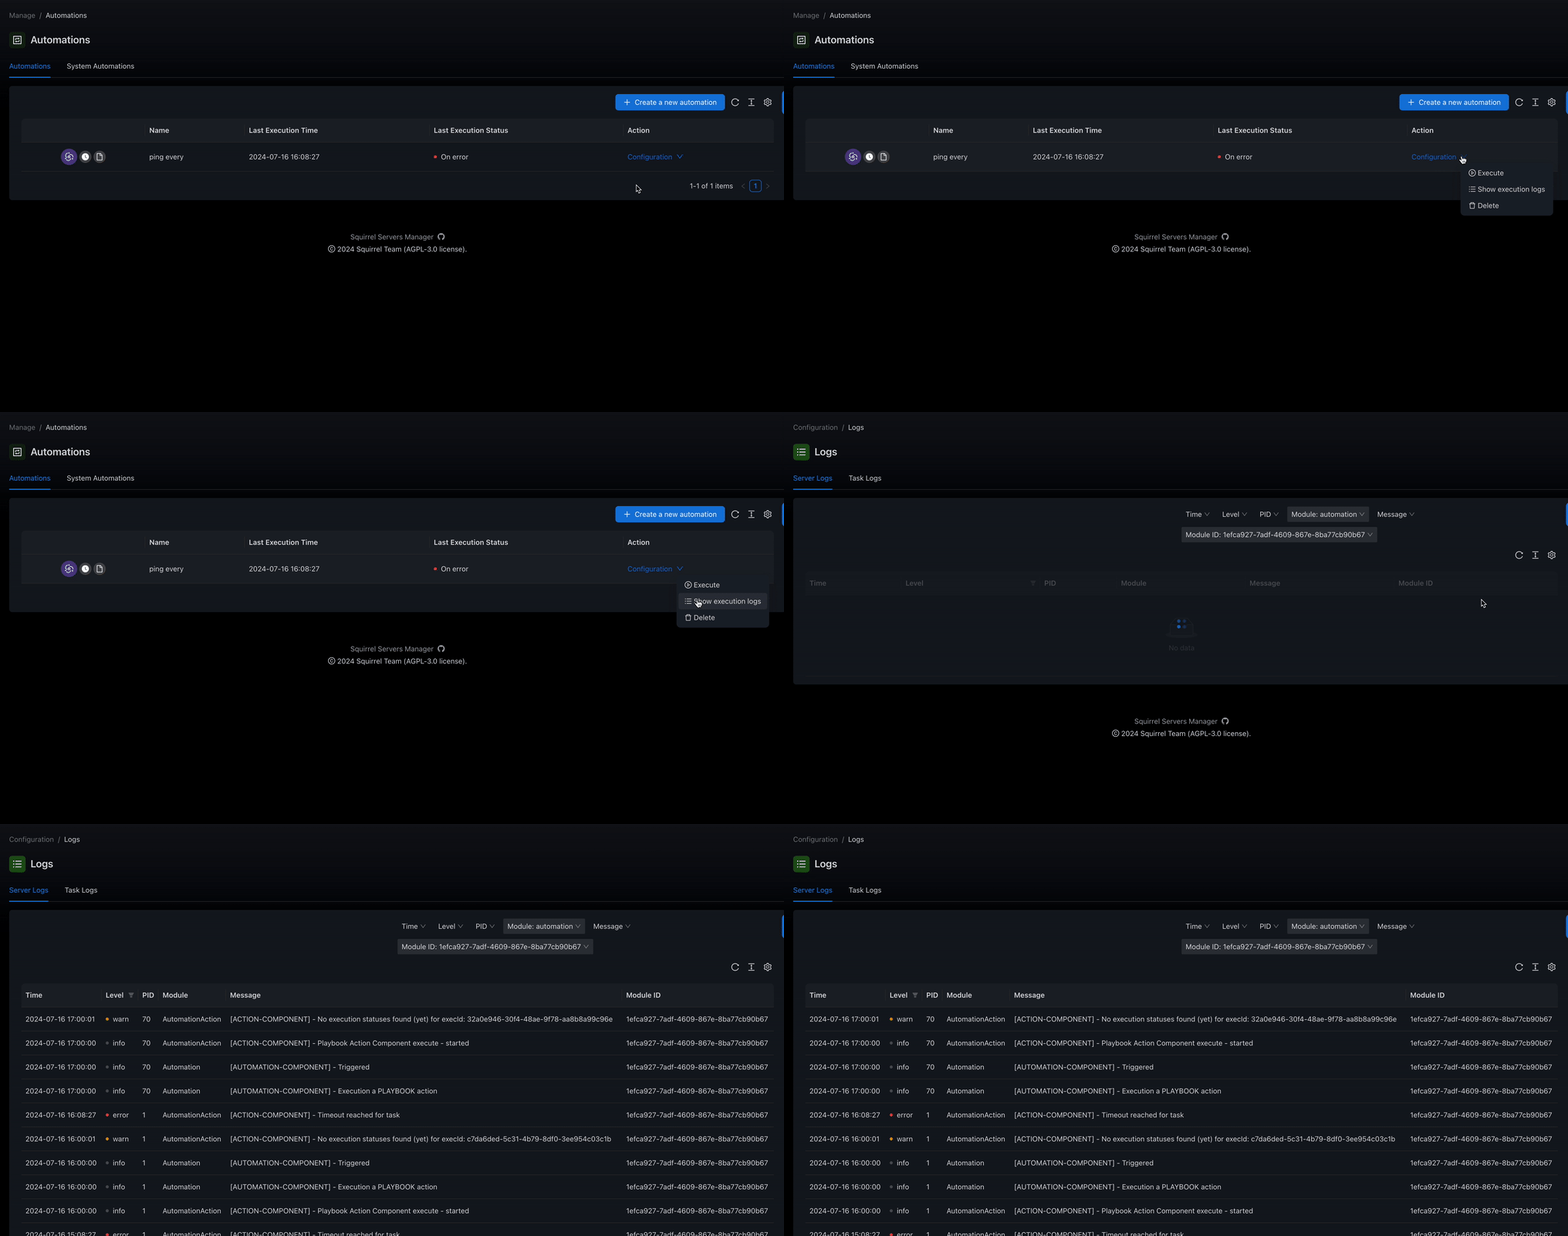
Viewing Automation Logs
To verify that your automation is running correctly, you can view the execution logs:

- Find your automation in the list
- Click the downward-facing arrow to expand options
- Select Show execution logs
- Review the execution history and details
The logs will show:
- Execution start and end times
- Success or failure status
- Detailed output from the performed action
- Any errors or warnings that occurred
Managing Existing Automations
Editing an Automation
To modify an existing automation:
- Find the automation in the list
- Click the edit icon (pencil)
- Make your changes in the form
- Click Update to save
Disabling an Automation
To temporarily disable an automation without deleting it:
- Find the automation in the list
- Toggle the status switch to OFF
Deleting an Automation
To permanently remove an automation:
- Find the automation in the list
- Click the downward-facing arrow
- Select Delete
- Confirm the deletion
WARNING
Deleting an automation cannot be undone. If you're unsure, consider disabling it instead.